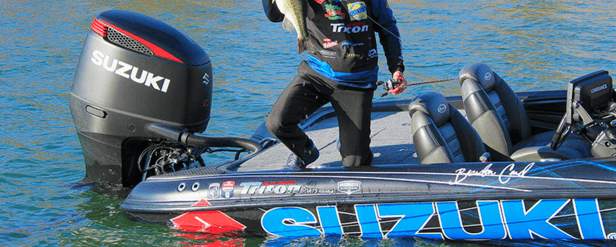
Old, faded decals on a boat may make it appear much older than it really is, but a flashy new design may just do the trick to spice up the look.
Here are some tips that may assist you without damaging the gel coat on your boat.
Something to note is that even though there are effective ways to remove decals, a subtle discoloration may remain in the gel coat. Therefore, it is recommended that the new decal covers or fills the same area.
Let's get into our steps for removing the decals:
The trick is to use a heat gun or a hairdryer as an alternative. Both work like a bomb and very seldom does this method leave any sticky residue because you are heating the vinyl before pulling at it.
Always use a plastic tool to scrape off the decal, this will take the thicker pieces off so that the adhesive is accessible which may be a bit trickier to remove. The objective is to keep your gel coat 100% intact, therefore a tool harder than a plastic scraping tool is not advised.
Next, you will need an eraser and a drill to remove the excess adhesive. Keep the speed of the drill quite low and carefully work your way through the decal area, ensuring that all the excess adhesive has been removed.
Should any stubborn adhesive remain on the gel coat, a microfiber cloth with methylated spirits / denatured alcohol can be used to remove it. This must preferably only be used for small areas.
Next, wet sanding can be done on the area to make sure that it is clear.
Wet sanding is a sanding process that uses water or another liquid as lubrication to wash away grit particles. Without liquid, your sandpaper may scratch the gel coat. For this process, it is advised to use 800 to 1500-gritt sandpaper. If you are sanding by hand, soak the sandpaper in a bucket of water until you are ready to use it. Be very careful at the hull corners and the top of the topsides where gel coat is usually the thinnest.
Putting the new decals on:
When ordering new decals, make sure that the manufacturer uses high-performance cast vinyl material with UV stabilizers which will help the branding last better in the marine environment.
Clean the surface where you are about to apply the decal and wash away all salt or residue. Then, clean the area with 70% alcohol and wipe it down with a microfiber cloth.
Next, measure and mark out the exact position for the new branding. A grease pen can be used to make small marks to guide you. When applying graphics, you always need some extra hands to apply masking tape to place the decal in the correct position by sticking it on the edge of the transfer or graphics paper.
If you are satisfied with the placement, you can pull the backing paper from the top allowing the decal to adhere as you pull down on the backing. Should there be creases, pull them away with the transfer paper and then place it back down smoothly.
Bubbles can be removed with a squeegee from the center outward.
Slowly remove the masking tape then you can remove the transfer paper from the decal at a 45-degree downward angle. Should the transfer paper tear, you can continue taking it off from the upper left corner at a 45-degree angle.
There you go, your boat look is complete!
Happy Boating!
